Pages

Friday, 26 November 2010

Some Christmas Makes

As I completed a lot of Christmas back stock early (I highly recommend this!) it has given me a super opportunity to work on a few bits for myself. Along with sewing, I also love crocheting and have really gotten into it in the last year. Last Christmas, I purchased the Nov/Dec edition of Crochet Today in the hopes of making a few bits in it but never got around to doing so. This year, however, I pulled out the magazine and decided on two I really wanted to do.

Gingerbread House - I've done the front, back and one side so far. Still lots to do but I can't wait to see this finished! So cute!

Tree Skirt. I'm doing mine in different colours - blue, pink, white and sparkly blue. It's coming along nicely and it's going to look fab under my white tree this year (which uh, I have already put up!).

Do you have any plans to make anything for yourself this Christmas?

Don't forget, you can get yourself 15% off on everything at http://titchables.co.uk/ and http://www.titchables.co.uk/ until Tuesday, just quote "jinglebells" when going through checkout (make sure you put the code in the coupon bit otherwise there may be a delay in getting your discount)! The sale has gone down a storm so far and I am trying my best to get things re-listed as quickly as possible.

Wednesday, 24 November 2010

Christmas Posting Dates and SALE!

Well as hard as it may be to believe, Christmas is fast approaching so it's that time of year again where I let you know the last posting dates so you can get your goodies in time for Christmas!

Australia/Asia - Dec 6th 
 USA/Canada/Europe - Dec 10th
UK - Dec 20th


As a special treat, for the next 6 days I will be running a BIG SALE, a massive 15% off on all orders up until November 30th. All you have to do is enter "jinglebells" when going through checkout at either http://titchables.etsy.com/ or Titchables.co.uk!

Make sure you take advantage of these massive savings as this includes EVERYTHING in the shops!! If you have any questions, feel free to leave a comment and I'll get back to you!

Tuesday, 23 November 2010

Blossom Plush + Harry Potter

I have been wanting to make a tree plush for ages and ages and have been sketching ideas for the past few months but nothing has really urged me forward to actually creating anything. Finally, I had a brainwave and this blossom tree was born! 

 I'm really proud of how this one came out. It took a bit of time to put together as all the flower petals are sewn on individually but it was definitely worth the effort!


I decided to make the back a bit cute as well by sewing on a heart. :) The tree is now available at my etsy shop!

---

In other news, I finally saw Harry Potter today and I loved it! I won't spoil anything for you but I did adore the re-telling of the Deathly Hallows bit (hopefully those that have seen it will know what I mean). So inspiring! Bit of a depressing movie overall but I still really enjoyed it. I'm going to London next week and while there, I'm planning on seeing it on the imax so can't wait for that! Roll on June for Part 2!

Saturday, 20 November 2010

White Christmas Trees

This year I have purchased a brand new (fake) Christmas tree. I've been wanting a white one for 2 years and I finally got my dream tree! I'm currently sorting out my living room (it's a funny shape so things needed to be moved around a bit!) so I have the perfect place for it but in the meantime, I thought I would share with you some white Christmas tree inspiration!


So what kind of Christmas tree do you go for? Green? Black? Real? Fake? Upside down?

Thursday, 18 November 2010

Sewing time!


It's been a bit quiet at the day job now that the tourist season is over. I work in a little clothes shop which is tucked away so it's perfect opportunity to sit by the heater and sew the day away. Don't get me wrong, I do occasionally have to serve customers, but that is becoming a rare occasion.

Either way, this is what I managed to finish last weekend. A bit of back stock, re-stocks and new stock! The newest items are some needle cases and 2011 diaries and a brand new plush which I am so pleased with - a cute pink blossom tree! All will be going in the shop over the coming days. :)

Tuesday, 16 November 2010

New Spotty Buttons


I received these lovelies over the weekend. Little spotty buttons in 9 new colours. These are a bit smaller (12mm) then what I've stocked before as I've had to change supplier, but just as cute! You can now buy them individually for 10p each over at  the Titchables Online Shop!

Also on that page, you can purchase the remaining stock I have of the old spotty buttons which are now reduced in price to clear!

---

Coming soon: Prepare yourself for lots of Christmas inspiration! I have declared it time to get excited about the festive season and I'm getting lots of pretty blog posts ready for you in the run up to Christmas!

Saturday, 13 November 2010

Advent Calender Tutorial


Introducing the Titchables advent calender tutorial! I've been working really hard on this for the past month - designing, making and writing it up and I'm so excited to share it with you. So without any further delay, here it is!


Materials
- 2 x White Felt Sheets (9"x9")
- 6 x Coloured Felt Sheets (9"x9") - I used Red, Leaf, Turquoise, Electric Blue, Pistachio and Hot Pink from my range.
- Interfacing
- Ribbon
- Ruler
- Scissors
- 6 x Coloured Embroidery Threads (I used similar colours to the felt)
- Craft Glue
- Sewing Needle
- Embroidery Pins

Step One
- Cut 24 2inch squares. 4 per colour. You then want to arrange your squares - 4 across, 3 down. This is just so you can sort out what colours you want your numbers.


Step Two
- Cut out your numbers! I did the colours at random, but tried to give as much contrast as possible. I cut all the numbers freehand, but if you don't feel confident to do that here's a tip: Go into any word processing program, pick a nice thick font and put the font size up to 72 (you may need to adjust this depending on the font). Type out numbers 0-9, print and there you have your number pattern!


Step Three
- Grab your craft glue and stick all your numbers on to the squares. This is a bit of a cheating way of doing it, so if you do want to sew them on, go for it!


Step Four
- Now you want to arrange your squares properly on your white felt. There was nothing technical to this, just get them as level as possible and centred. When your happy with your positions, get your embroidery pins and pin them to the white felt sheets.


Step Five
- Time to sew. I used a back stitch, which is a bit time consuming so make sure you get yourself comfy with a cup of tea (or whatever your favourite drink is!). And a bit silly pointing this out, but remember to leave to top edge. Whichever way you sew your squares on, make sure it's a nice secure stitch so nothing can fall through.


Step Six
- Now's the time to attach your two big felt sheets! You'll need to put your lower white sheet just below the bottom coloured squares on your top white sheet. Pin in place. I used a sewing machine to attach, but if you don't have one, hand sewing will work just as well!


Step Seven
- Get your interfacing and place your calender on top. Cut around the edge, but leave about an inch extra around all sides. Turn your calender over so the back is on top, place the interfacing over the top (the rougher edge should be facing down) and iron over well until firmly attached to the felt. You then need to cut around the edge so it's nice and neat. (The interfacing is for giving the calender a bit more strength and shape).

Step Eight
- You're now going to attach the ribbon so you can hang your calender up! Cut 2 bits about 6" long. Important bit! When attaching the ribbon, make sure both sides are level. I attached the ribbon by putting in a running stitch, but as long as you make it secure any way is fine. Now you just need something to hold the whole thing up! I used a long wooden dowel, but you could use anything you have to hand.


And your done! All you need to do now is put something lovely in your pockets. Sadly the chocolate I bought is a smidge too big so I'm going to have to go out and get something else (which is just terrible - extra chocolate, yuck!!...) but you can put whatever you fancy in there - messages, sewing bits, activity cards (great for the kids!) - the possibilities are endless!

I really hope you enjoyed this tutorial and if you do give it a go, I would love to see the results! I have set up a flickr group for you to share your final pieces, or you can even share your in progress shots! If you need any help or any encouragement feel free to post something in the discussion section!

Friday, 12 November 2010

Christmas @ Titchables


Christmas @ Titchables

Originally uploaded by titchables

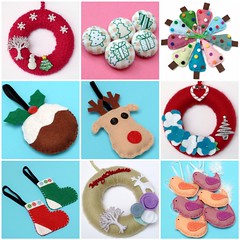
All these Christmas items (and more!) now all come with FREE SHIPPING over at the etsy shop!

So head on over and grab yourself some festive lovelies for your home this Christmas! :)

Thursday, 11 November 2010

New Business Cards!


I recently designed some brand new business cards for me to send with my parcels and they arrived just in time too, as my old one's had ran out! I really like how clean and simple these look, and the fact that the back in blank for me to write a personal thank you note to the buyer.

It's been really busy in the shops the last couple of weeks which is fantastic! I had a felt delivery on Monday but I've had to order some more today to replenish. I've also ordered in some brand new spotty buttons which should be arriving soon.

I have decided to cancel the ornament exchange as there wasn't a lot of interest. Maybe I'll try again next year! Sorry to the people that did sign up.

The sneak peak which I showed you earlier in the week is on the way, I just need to put the finishing touches on it! So excited to share it with you!

Tuesday, 9 November 2010

Q&A with me!


I was recently honoured to be asked to take part in the Gnovember celebrations over at the Gnome Angel blog. The interview has now gone live so you can now check it out right here!

This was my first time doing a Q&A and I had a blast. I hope it gives you the opportunity to get to know a bit more about me and what makes me tick.

Saturday, 6 November 2010

Sneak Peak


Here's a little sneak peak of an upcoming project that I'll be posting on the blog. I've been working on this for about a month and I'm excited that it's nearly ready to share with you all. I hope you'll like it too when it goes live!

Wednesday, 3 November 2010

More Mini Wreaths!

Two more Mini Yarn Wreaths are now available at the Etsy shop. All the wreaths for this season are exclusive to etsy, and will not be available at my other shops. All are unique so once one has gone, that is it!


You can check out the Christmas section at the etsy shop and the online shop. I am happy to do any custom quanities of any of the handmade ornaments (except the wreaths) up until about the 20th of November. If you are interested, feel free to email me. :)